Building a DS Workstation
December 30, 2019
computersI’ve been collecting various computer parts for about a year now in anticipation of AMD’s 7nm release of their Threadripper CPU. I’ve finally completed the build and this is my opinionated guide to building a computer for data science and other computationally intensive tasks.
Before I get into the build, I’d like to just lightly touch on the “rent-vs-buy” analysis when it comes to computers. For myself, computers are a hobby and therefore will always be a buy decision for me, but if you find yourself only using it for specific tasks and then not using it at all afterwards, I would recommend a rent approach, e.g. renting time on an Amazon AWS EC2 or an equivalent solution from Google or Microsoft.
The next thing I should mention is how to organize your data. Keeping everything in your head is not ideal, especially when there are some very superb computer build tools out now! I personally used https://pcpartpicker.com/ to keep track of all the parts and also all the prices (including the merchant with the lowest price!). I would recommend you use something similar vs. just keeping it in your head or even a spreadsheet.
Let’s get started then!
Case
When it comes to computer cases, i.e. the thing that holds everything together, in my opinion there are only two important considerations. The first is cooling capacity, and the second is looks, in that order.
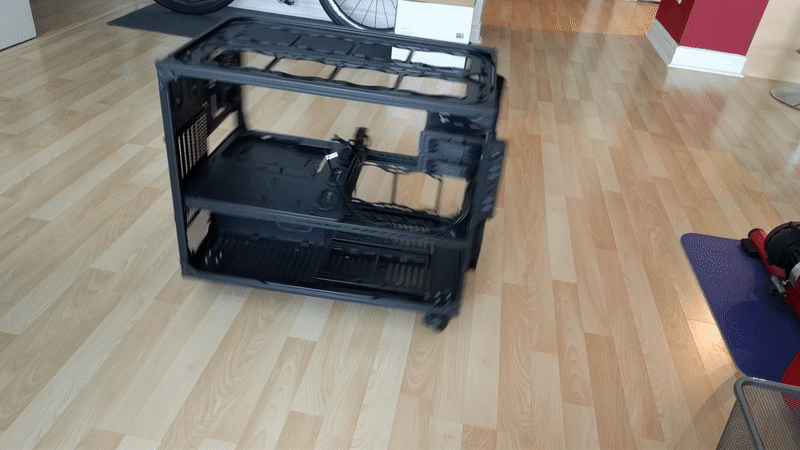
With those considerations in mind, I went with a case that’s a few years old now: the ThermalTake Core x9.
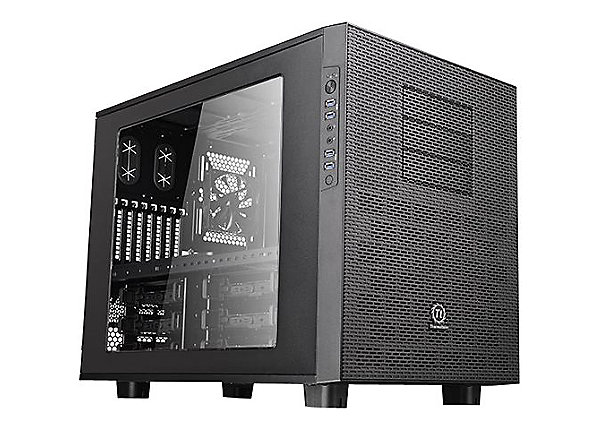
Cooling capacity:
- 4x480mm radiators
- Multiple smaller sized radiators
Looks:
- Cube
This case has more cooling capacity than I need with my current build and I really like the cube case look as it fits in my room rather well.
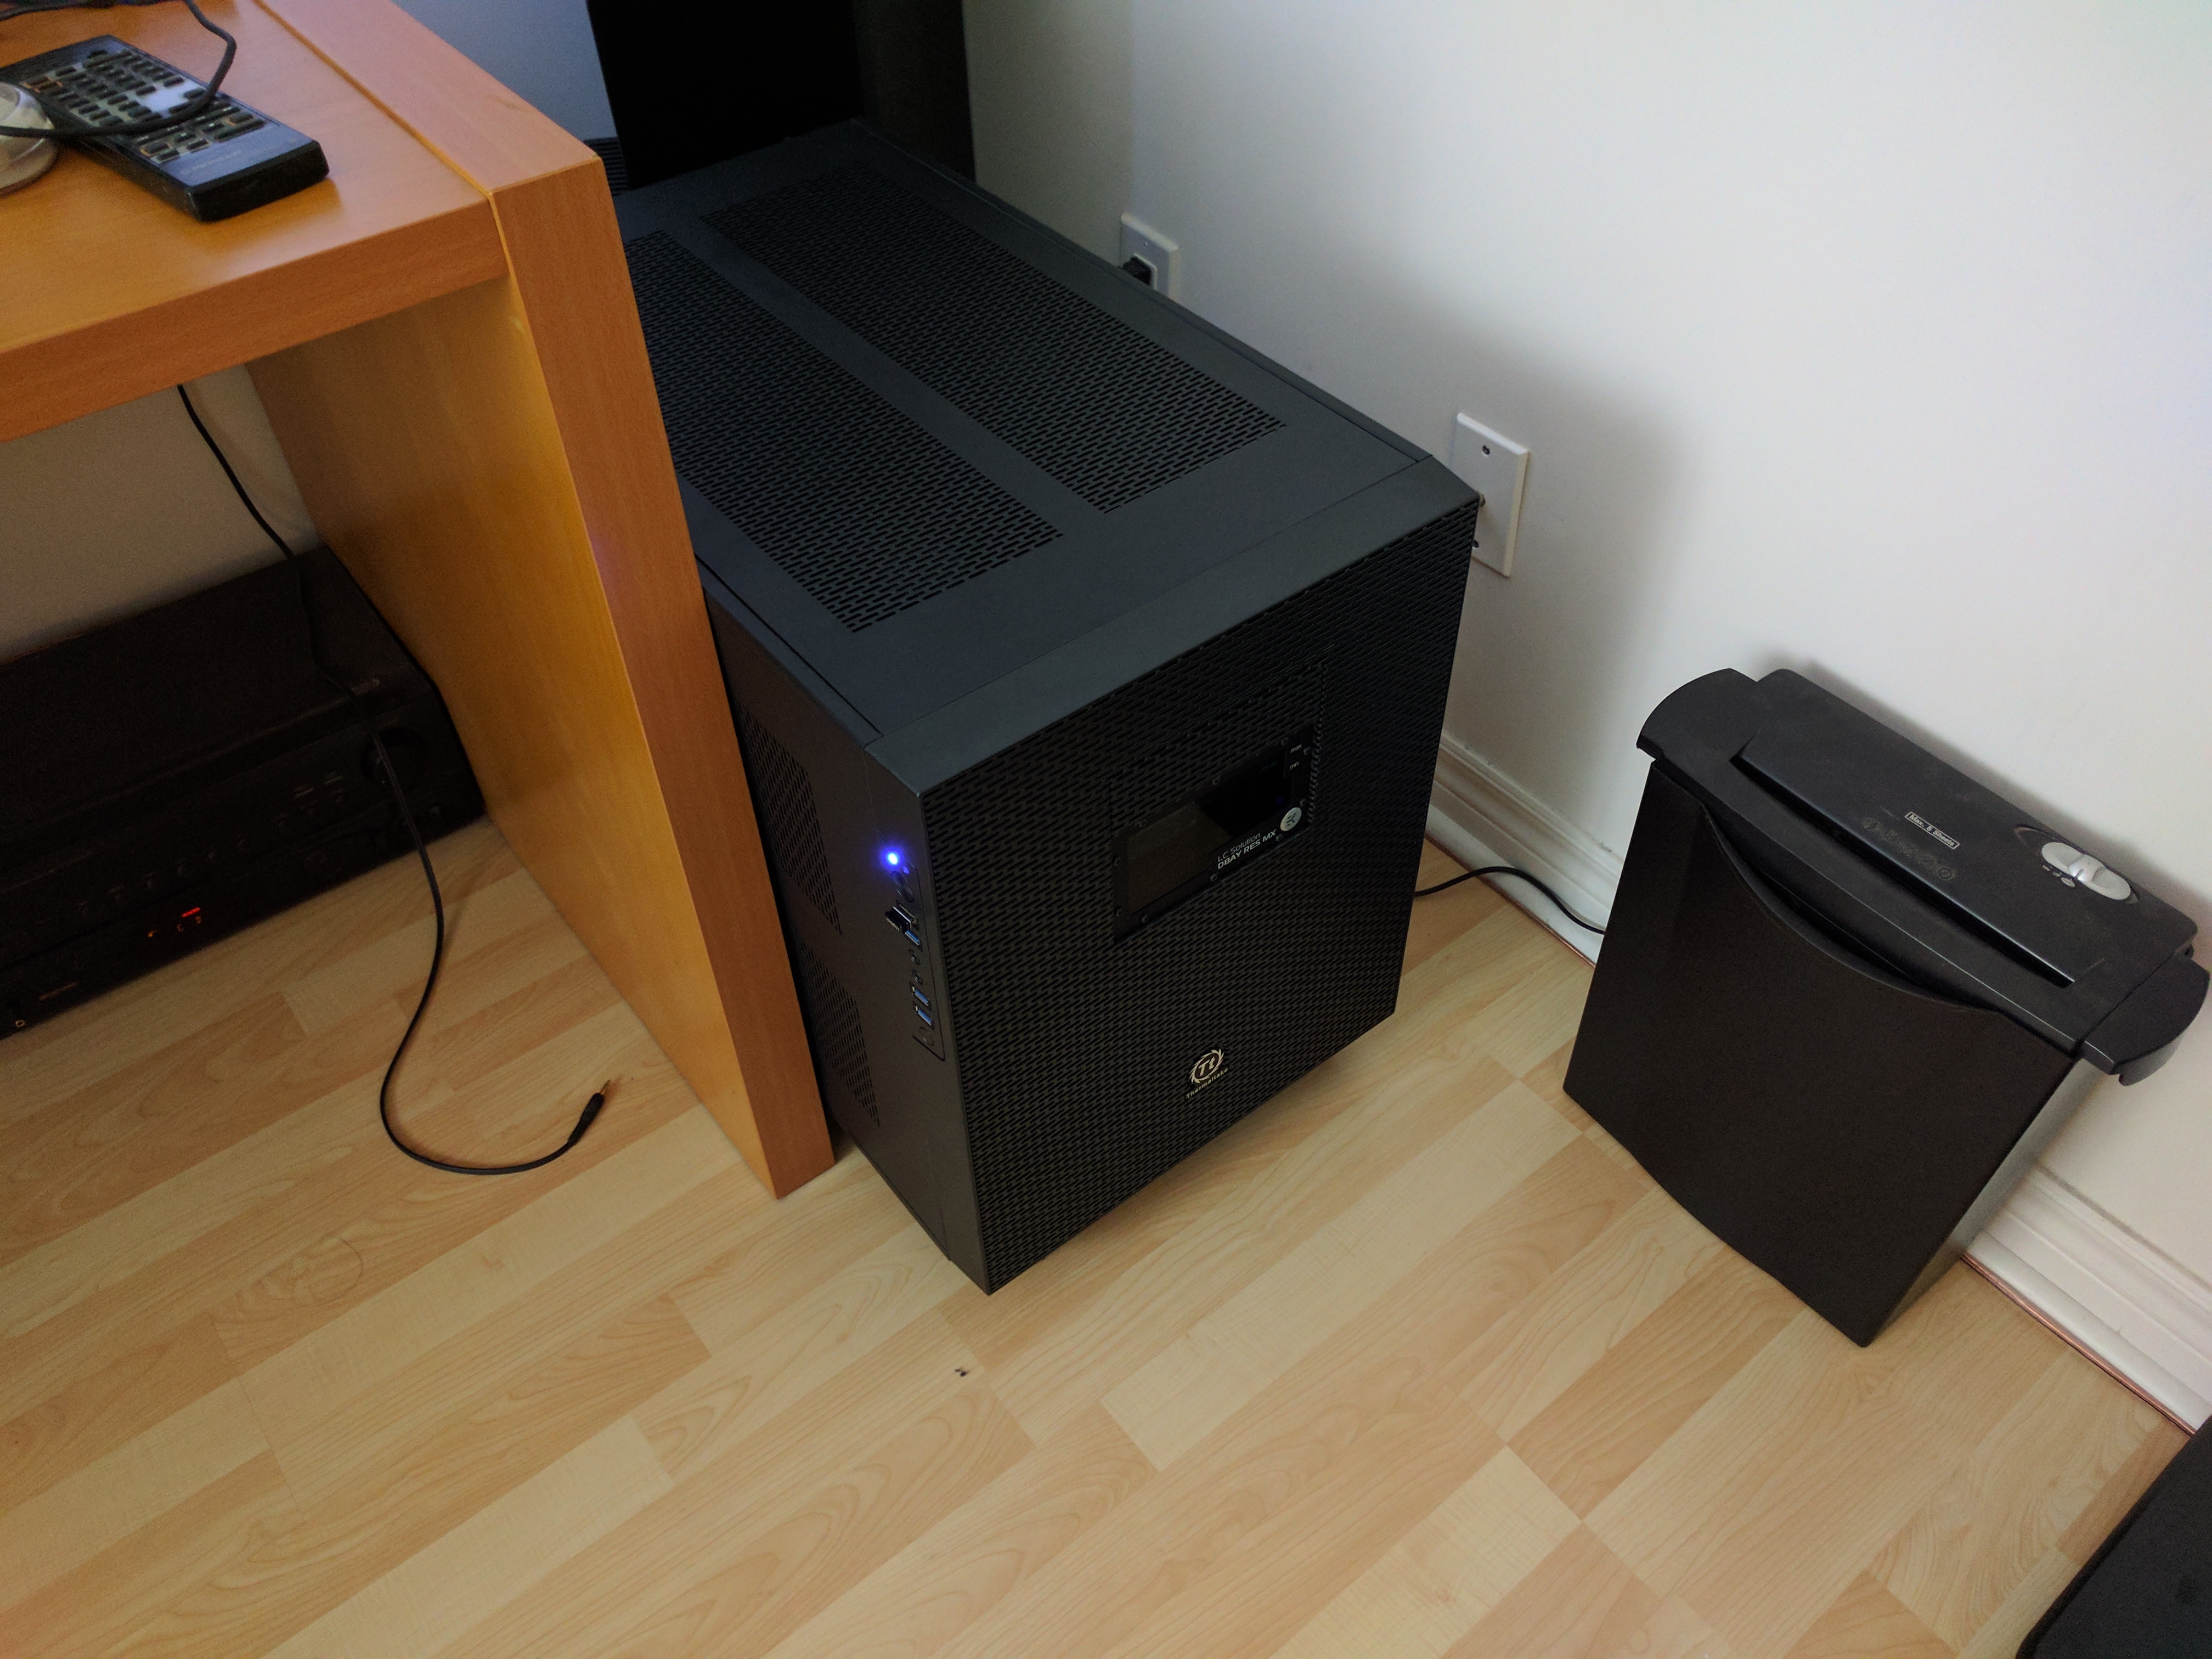
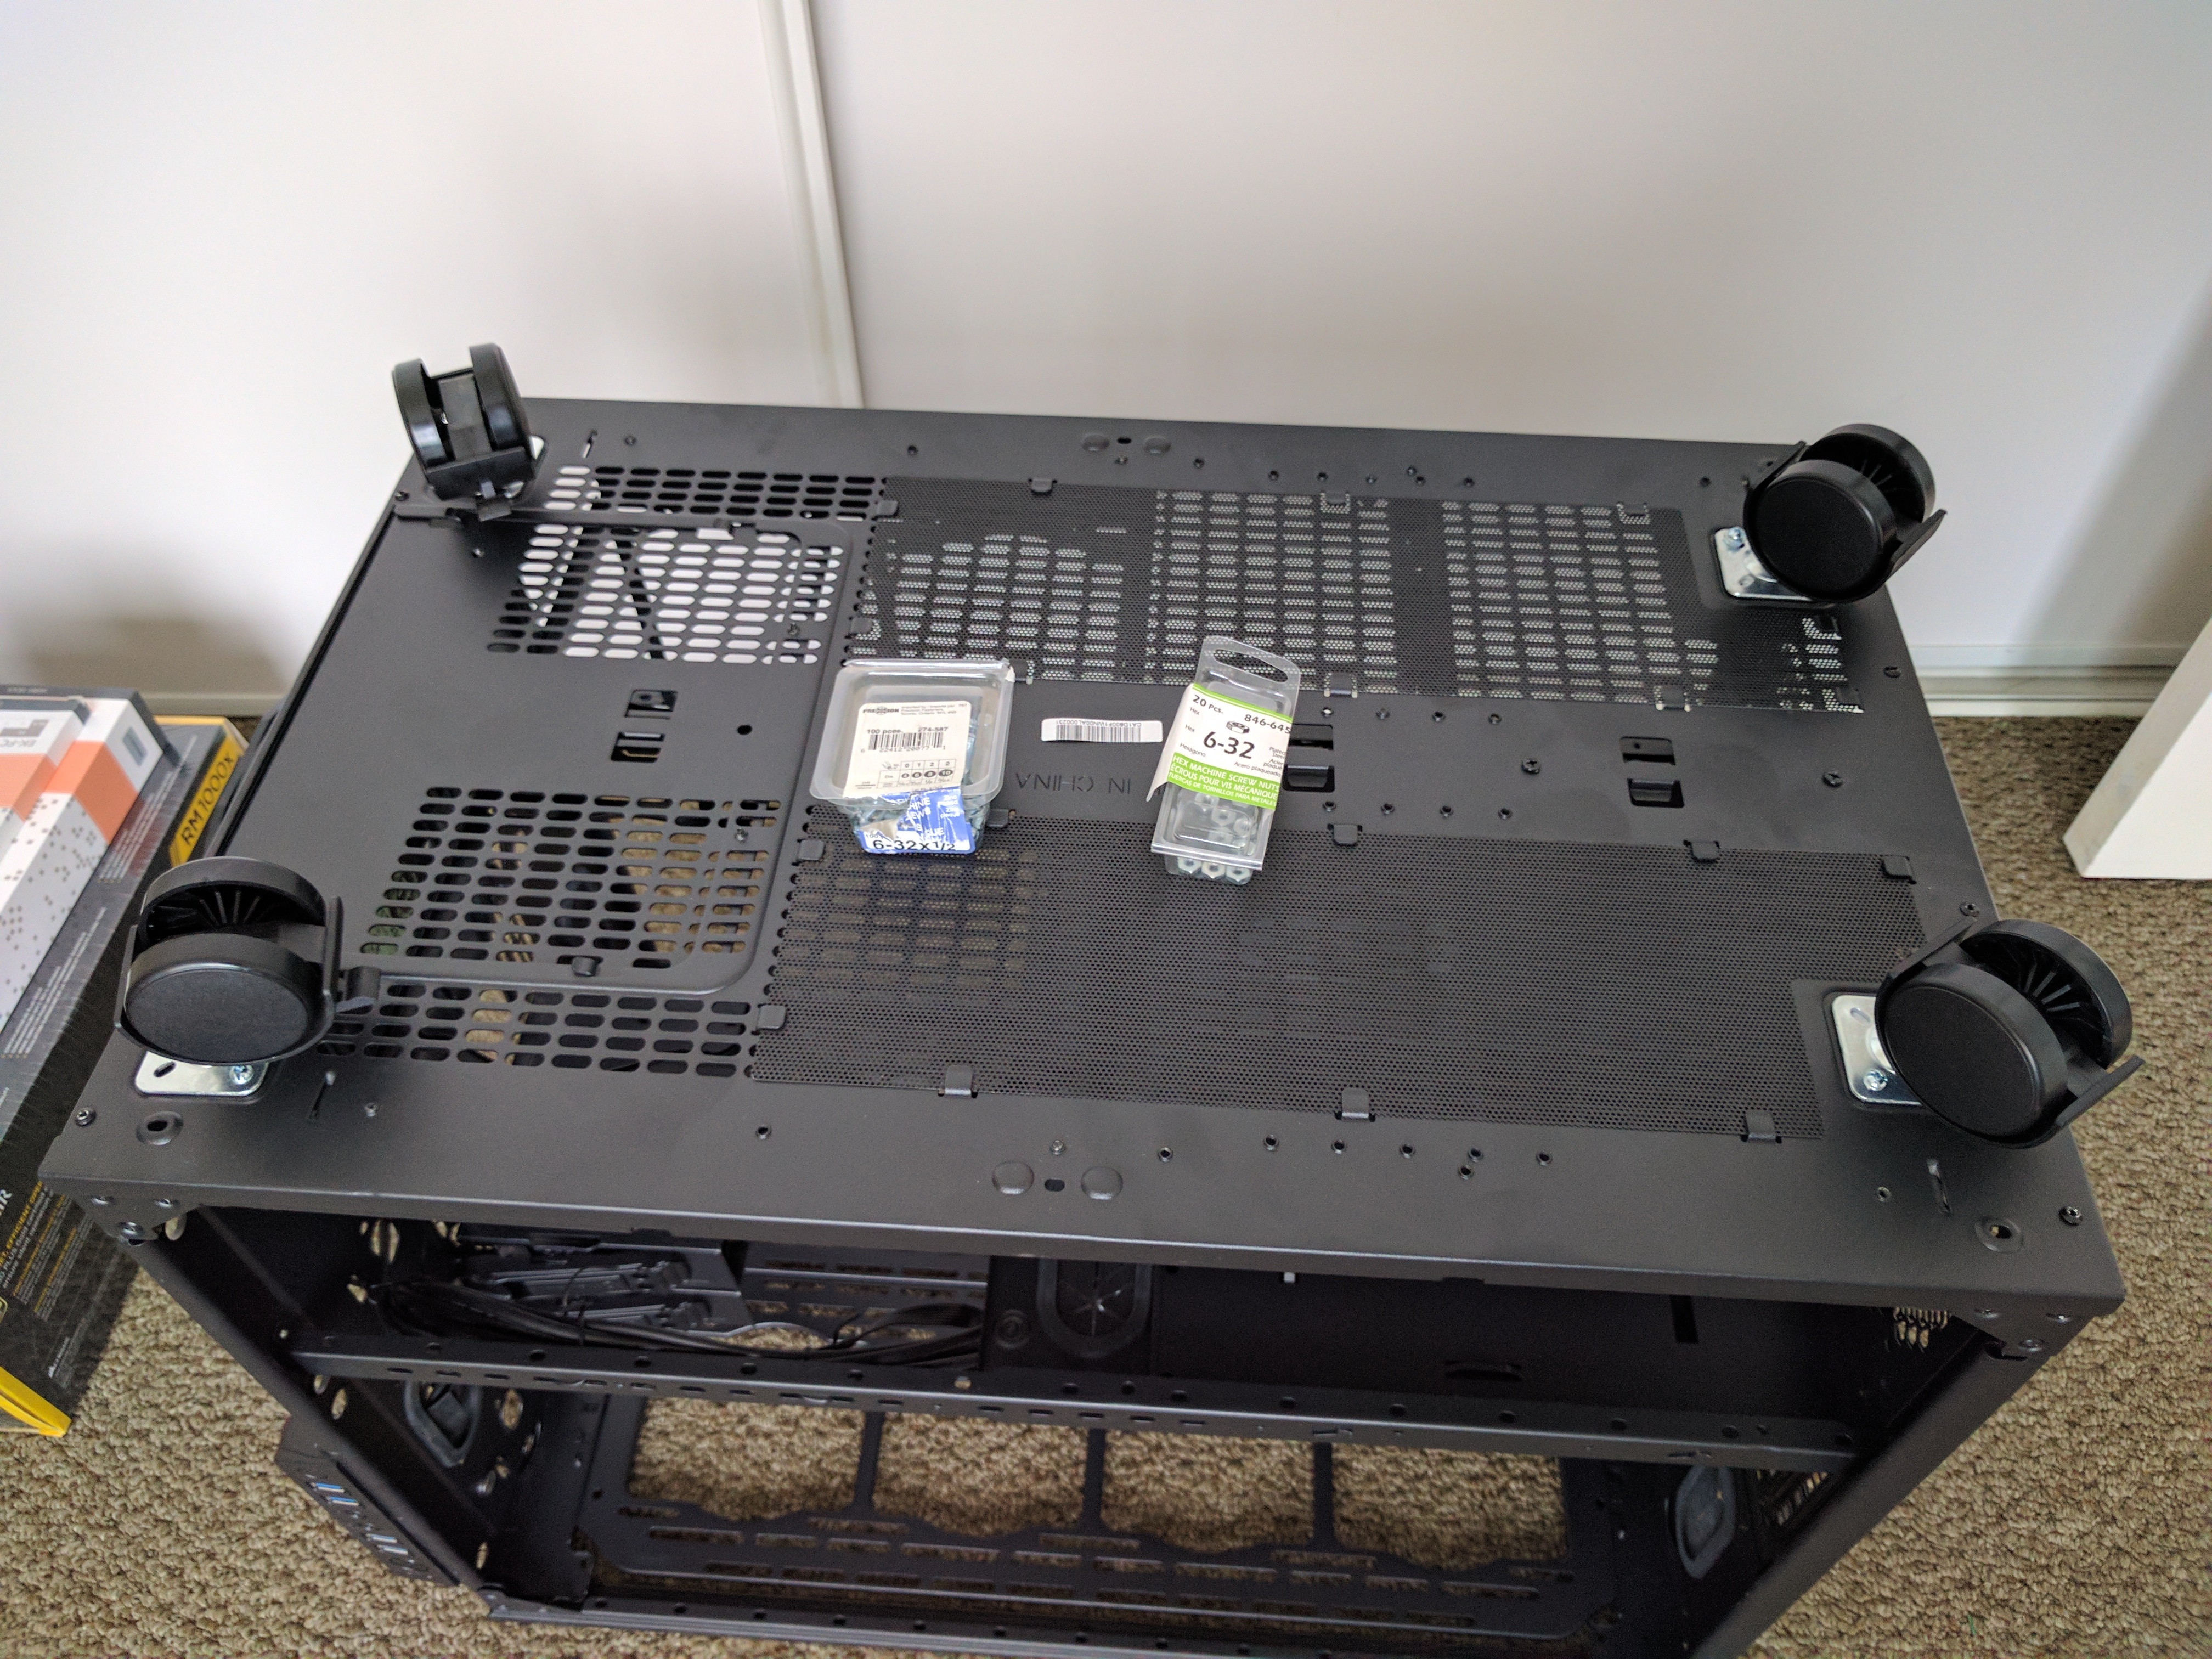
I made one modification to the case which I think is essential… wheels! The case itself is 40 lbs without any parts. With parts it can easily double, and then with water cooling (which is what I will be using), it’ll be much too heavy for me to move.
I picked up the wheels and the screws from my local hardware store, Rona.
Wheel details:
- 1“x1” mounting plate screws perfectly onto the holes in the case
Mounting hardware details:
- 6-32x1/2 (can use shorter screws) screws
- 6-32 hex screw nuts
Now the case can be easily moved!
Cooling
Cooling is in my opinion a critical part of building a computer and a decent budget should be allocated here. I chose to do a full custom watercooling loop capable of dissipating my estimated 800w of heat coming out of my components.
In terms of watercooling components, here are the major ones that I went with:
Radiators:
- 2x 480mm long, 45mm deep Alphacool radiators
Water blocks:
- Watercool Heatkiller IV Pro TR4 CPU water block
- EKWB EK-FC Titan V water block
Reservoir:
- EKWB EK-DBay reservoir
Water pump:
- D5 Vario 8-24V Pump with a tachometer (MCP655)
Fans:
- 12x Gentle Typhoon Performance Radiator Fans (550-1850 rpm) 58cfm
Misc:
- PWM Fan splitters
- Thermal Grizzly Hydronaut thermal paste
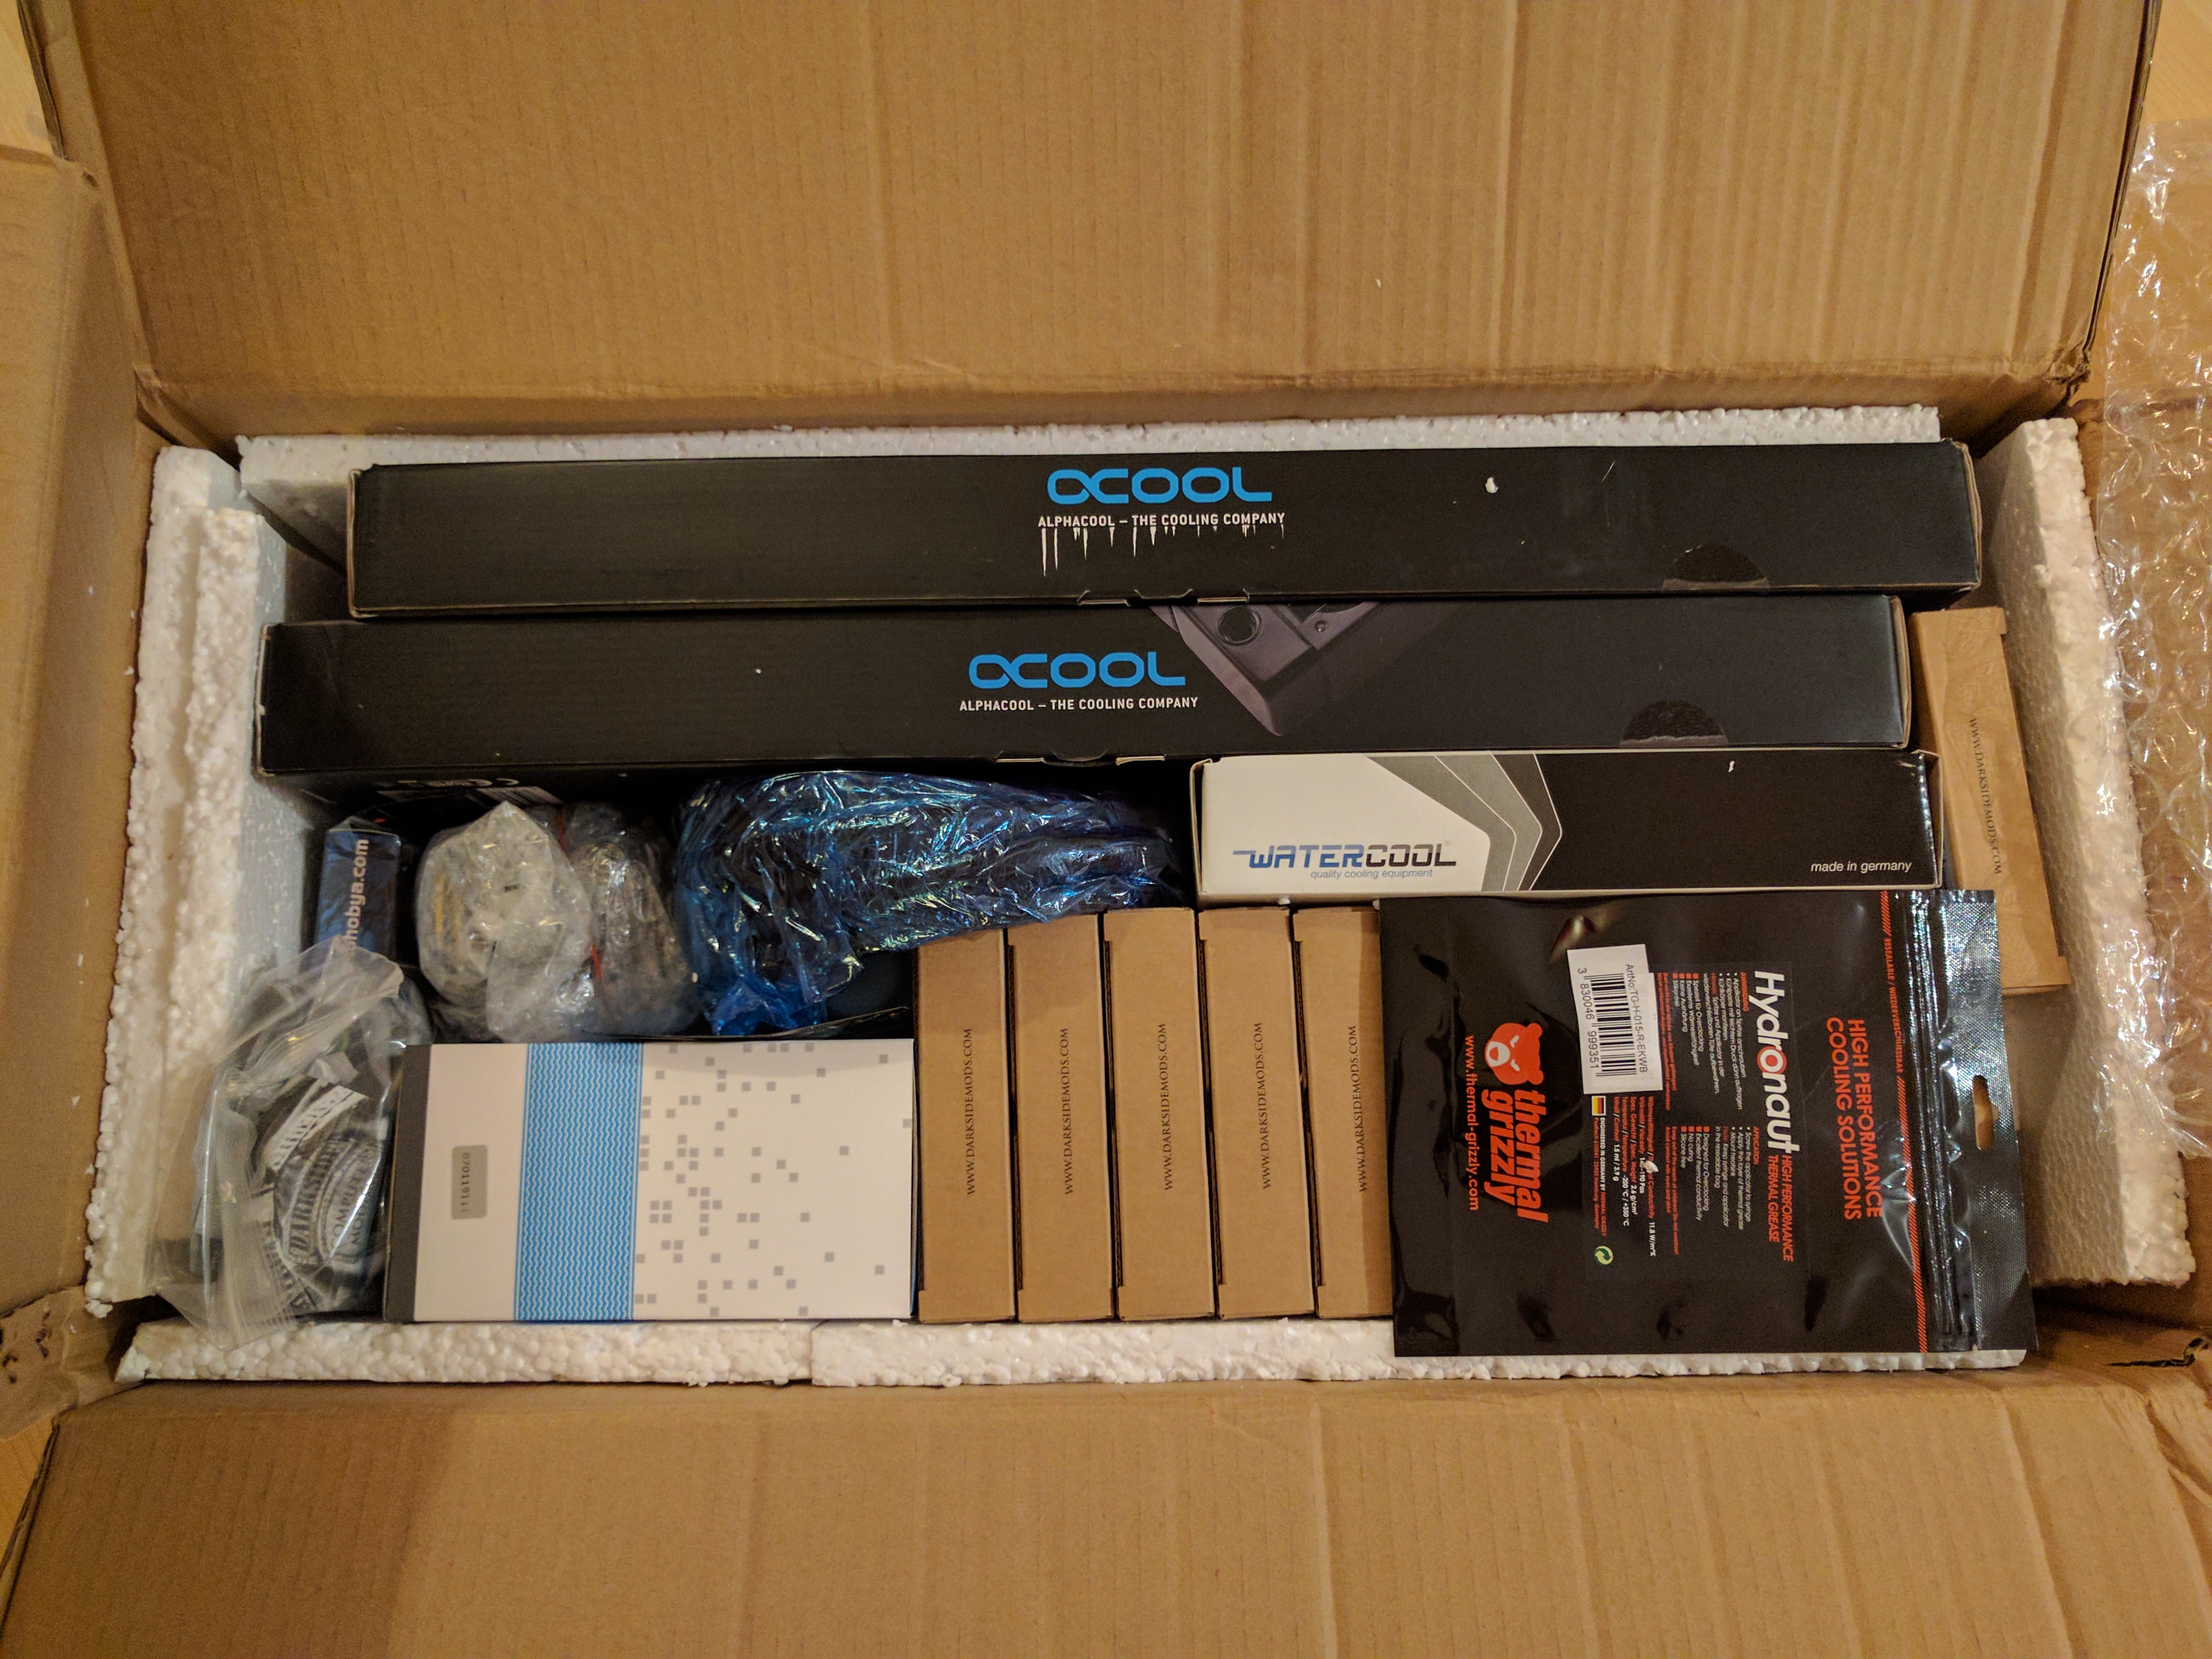
I ordered all my parts from https://www.dazmode.com/ and it came out to about $1,400 CAD. The one thing that I did forget is to add a water temperature sensor. Knowing water temperatures can help determine if the heat is being transferred to the cooling system optimally.
Some more cooling pictures:
CPU
At this point in time, there’s no real debate as to which CPU to use… it’s AMD Ryzen 3000 series. With AMD Ryzen 3000 there is one choice to make: a mainstream desktop CPU or the high-end desktop CPU. This is a budget/performance trade off. I chose the high-end desktop Threadripper CPU as I was coming from a HEDT Intel processor that I built in 2010.
AMD Threadripper 3960x - 24 cores/ 48 threads @ 4.2 GHz all-core / 4.5 GHz single-core:
RAM
When it comes to RAM there are two considerations: speed and amount. AMD recommends a 1600 MHz (PC3200) DDR4 speed as benchmarks show that speeds lower than 1600 MHz are significantly slower. The amount of RAM will depend on your data sizes. I would recommend a minimum of 64 GB but you may be able to get away with only 32 GB. Another heuristic to consider is the amount of RAM per CPU core as a metric for multi-processing workloads. Aim for at least 2 GB per CPU core.
I used the G.Skill Ripjaws V Series 64 GB (4 x 16 GB) DDR4-3200 Memory. Since my motherboard has 8 RAM slots, this allows me to add additional RAM in the future if necessary.
Storage
There isn’t too much to consider here, choose the fastest and largest storage solution for your budget. That means at a minimum a NVME PCI Express 3.0 solution.
I chose the ADATA XPG SX8200 Pro 1 TB M.2-2280 NVME Solid State Drive.
For data that won’t be accessed frequently I would recommend an external solution using spinning disks as a more practical and budget friendly option. I run a QNAP 4 bay NAS housing 4x 3TB Western Digital Red drives in a RAID 5 configuration.
GPU
For data science, and specifically deep learning tasks, there’s only one company to choose from, and that’s Nvidia. All of the deep learning frameworks (e.g. TensorFlow, PyTorch) are compiled with CUDA for GPU acceleration and CUDA only works on Nvidia. Choose the card with the most amount of RAM as that will most likely be your limitation.
Currently the card with the most amount of RAM but still is somewhat priced reasonably is the Nvidia Titan RTX 24 GB.
I bought my card before the Titan RTX came out, and so am using a Nvidia Titan V:
Power Supply
For power supplies, there are two schools of thought. Purchase enough power supply to cover your power needs or purchase twice as much power supply to cover your power needs. The first one is most likely cheaper. The second is a little bit more efficient, and allows for future component additions.
The first step here is to calculate your power needs. Don’t do what I did initially and just roughly estimate it in my head. There are some really great online tools to help calculate your power needs. I used this one: https://outervision.com/power-supply-calculator.
I went with getting a 1600w power supply from EVGA. My original choice was the 1000w Corsair power supply but my power needs at load was around 975w which was too close to the limit for my comfort.
The Complete Build
Here’s the complete build:
On a DS Task
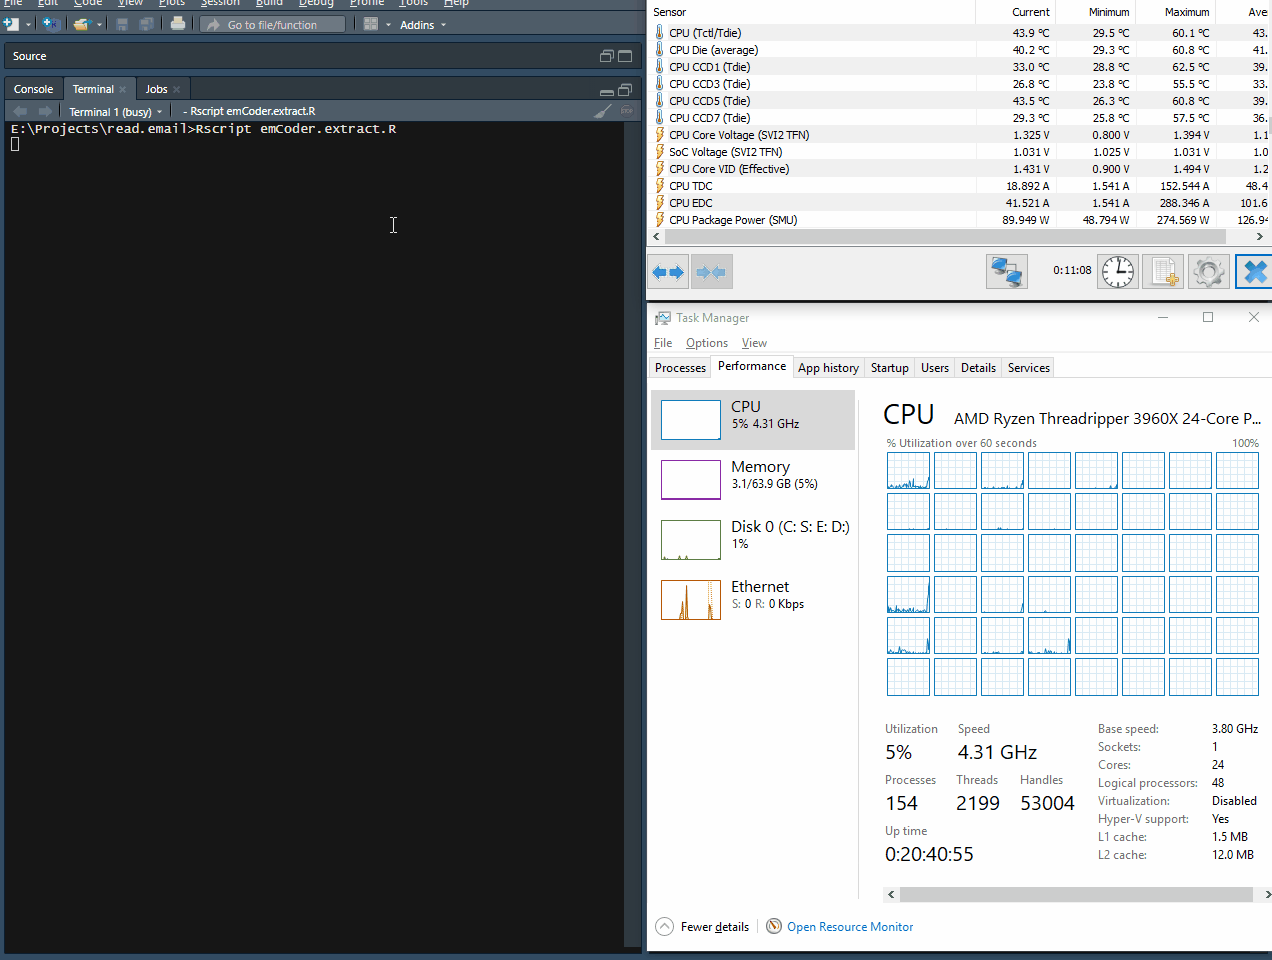
I developed a package for R to read and extract data from scanned email images (yes… I realize the absurdity of dealing with scanned in emails, but I’m in law enforcement and there are considerable lengths that some folks go to maliciously comply with some of our asks). The package itself utilizes multi-core processing and is capable of operating on each file independently.
Here’s the computer reading a whole bunch of my own personal test emails: